
Old photo repair
Old Photo Repair: Fix Scratches, Tears and Stains
Repair the damage first, then decide whether to colorize. Scratches, creases, tears and stains are removed from the scan without smearing the detail underneath.
Image Upload
Try these examples
Aspect Ratio
Image Resolution
 GPT Image 2.5 Flare
10 welcome credits · No watermark · JPG, PNG or WEBP up to 5 MB
Your photos stay in your account and are never used to train models.See how we handle your files →
What can the repair tool remove?
Damage is not one problem. The model separates paper damage from image content, so each type is rebuilt from the right surrounding texture.
Scratches and dust
Thin bright lines and dust specks are masked out and rebuilt from the grain around them, so a scratch across a face is not smeared into a grey stripe.
Creases and folds
A fold reads as a hard edge. The model rebuilds tone and texture across it instead of sharpening the line.
Tears and missing corners
Missing areas over background or fabric are rebuilt from the surrounding texture. A missing corner that contained part of a face is a plausible guess, not a recovery.
Stains and water marks
Discolouration and tide marks are corrected from the scan's own brightness distribution, not painted over with a flat patch.
Mould and foxing
Small spots and edge damage can be cleaned up; emulsion that has been eaten away cannot be recovered.
Repair examples
Two uploads, processed once. Drag the handle to compare.
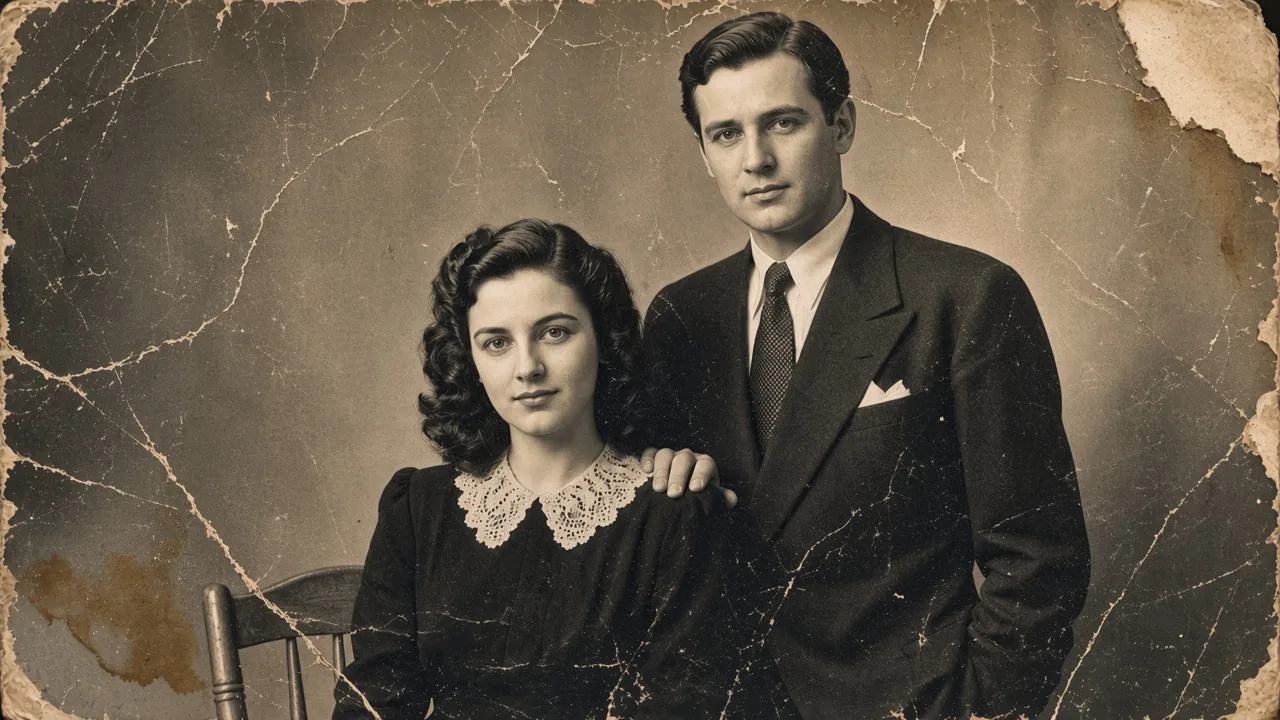
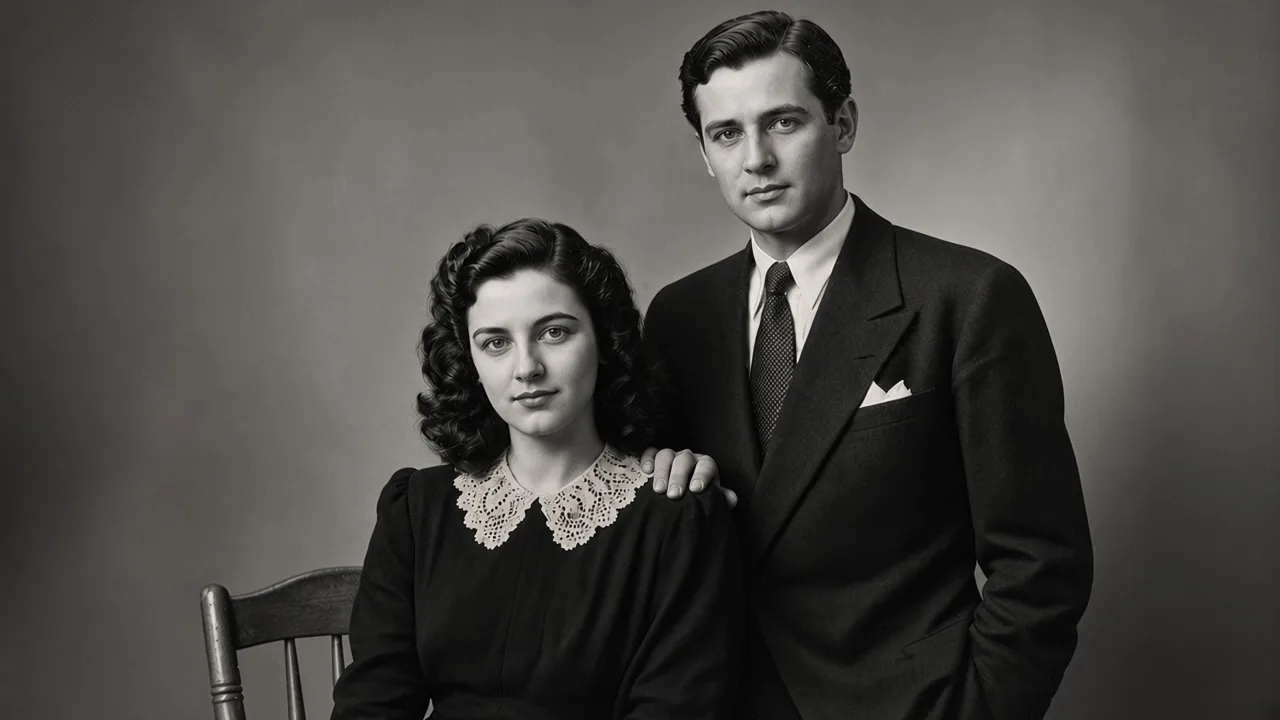 BeforeAfter
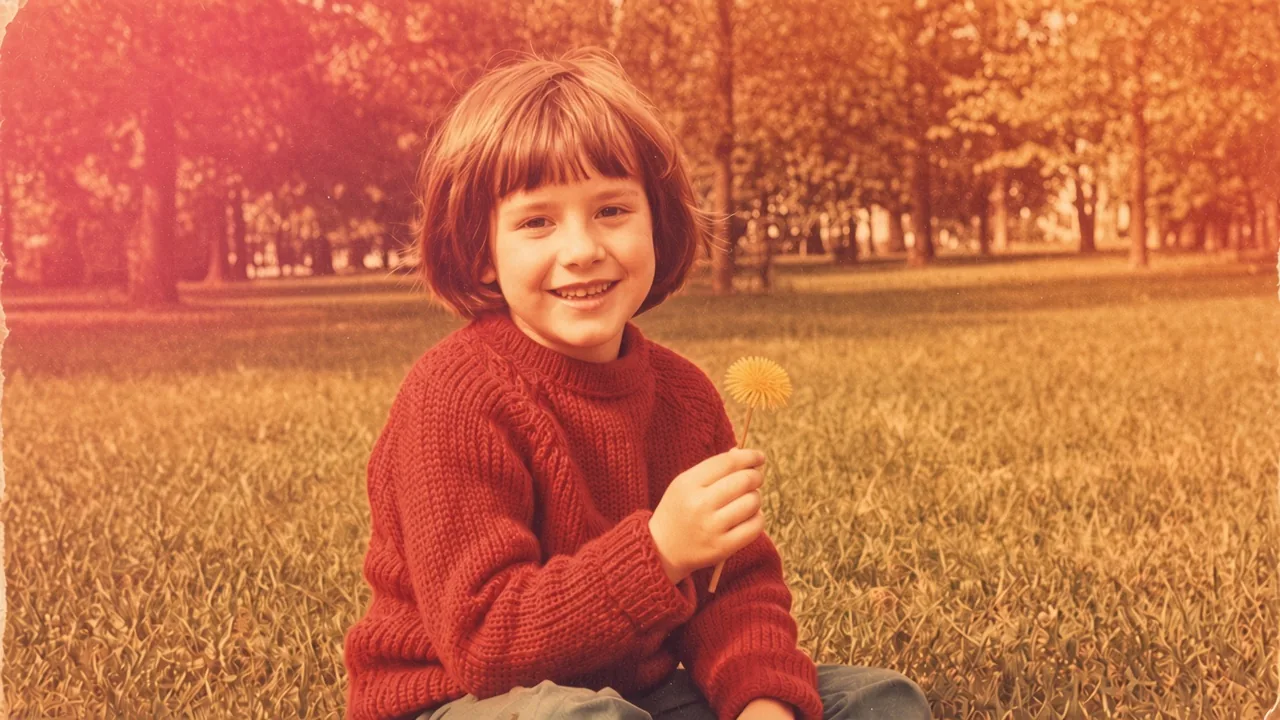
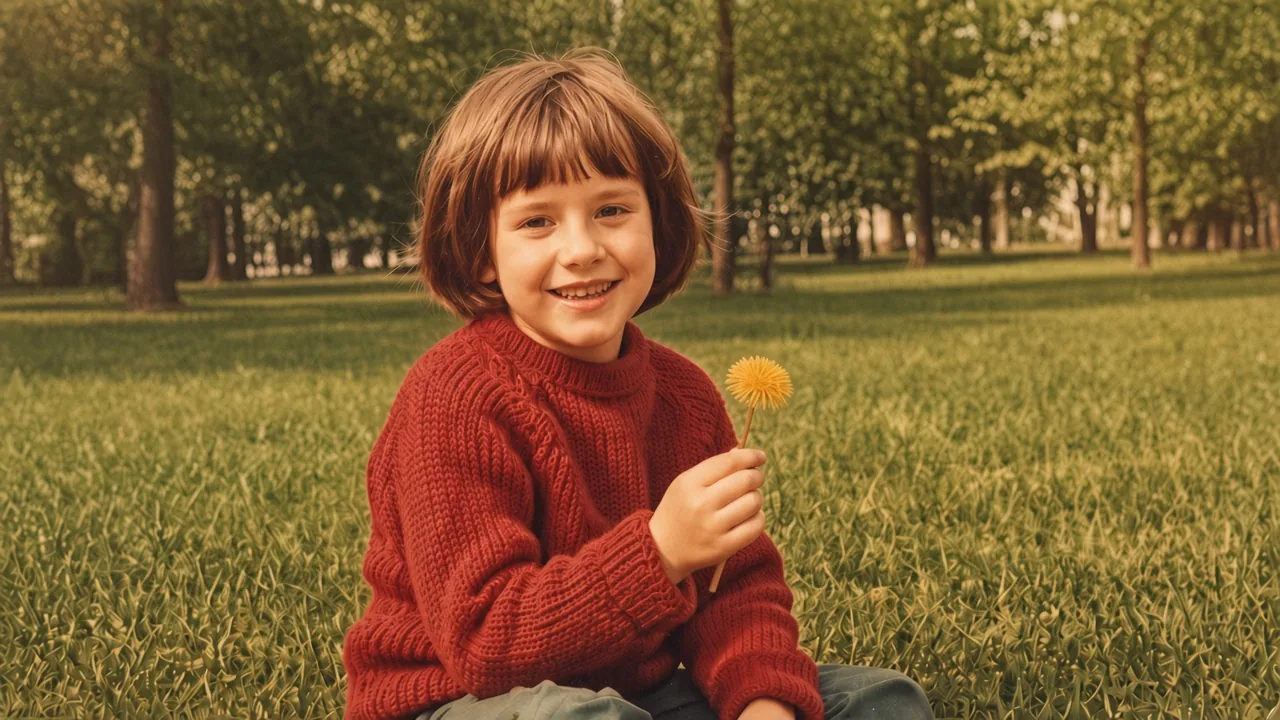 BeforeAfter
Repair in three steps
The repair pass is separate from colorization, so you can stop with a clean black-and-white print.
- 01
Upload the scan
JPG, PNG or WEBP up to 5 MB. A 300–600 dpi colour scan keeps the paper grain and gives the model more to work with.
- 02
Let the repair pass run
Damage is masked and rebuilt, fading and colour casts are corrected, and detail is sharpened in one pass. The colour toggle stays off on this page.
- 03
Check the damaged areas first
Compare faces, hands and the repaired corners at full size before you print or colorize. If a repair looks wrong, rescan at a higher resolution and run it again.
Should you repair before colorizing?
Cracks and creases read as edges, and a colorizer will pull colour into them, leaving coloured streaks across the damage. Run the repair pass first, then send the clean file to the photo colorizer.
Open the photo colorizerOld photo repair FAQ
What kind of damage can the repair tool actually fix?
Scratches, creases, tears, dust, stains, mould spots and missing corners on a scanned print. It works on the image file, not the physical paper, so the source has to be a scan or a photo of the print.
Can it rebuild a torn or missing corner?
Partially. A missing corner over background or fabric is rebuilt from the surrounding texture and usually looks natural. A corner that contained part of a face is a guess: the model produces something plausible, not something true. Check that area before you print.
Will repairing the photo make it look soft or smeared?
That is the main failure mode of damage removal, and the reason repair is a separate pass instead of one slider. Damage is masked and rebuilt from the grain and structure around it, so paper texture survives. If the result looks waxy, the scan is usually too low-resolution — rescan at 300–600 dpi.
Should I repair before or after colorizing?
Repair first. Cracks and creases read as edges, and a colorizer will pull colour into them. Run the photo colorizer on the clean file afterwards.
What damage is beyond saving?
Damage that destroys information rather than covering it: a face burned away or cut out of the print, heavy mould that has eaten the emulsion, water stains that bleached a whole area. The tool can still produce a smooth photo, but the detail you are hoping for is not in the scan.
My photo is both damaged and blurry — which tool first?
Damage first, then the unblur tool. Sharpening a crack makes it harder to remove cleanly, and removing damage from an already-sharpened file tends to leave halos.
Related guides
How to Remove Scratches from Old Photos (Without Smearing Detail)
A practical guide to removing scratches, creases and dust from scanned prints: what to fix by hand, what AI repair does, and when damage is beyond saving.
AI Photo Restoration vs Manual Restoration: Cost, Time and Accuracy
AI vs manual photo restoration: what each does well, what it costs, how long it takes, and when to choose one over the other.
See exactly what each plan includes, or buy a one-time credit pack.
Compare plans and credit packs